Tools of the Trade Explained
Momentum is a wonderful thing and we have it going here at MCRY! March 5 and 6 have been no exception with the help of Jeff Bloohm, Dave Bierman, Jason Sobcyznski, Jim Connor, Kevin Reihl, Tye Hasheider, Doug Klitzke, Dave Lee, Jeff Bloemers, Doug Crary, Steve Seibel, Mike Flood, Mike Wahl, Kelly Bauman and Skip Lichter.
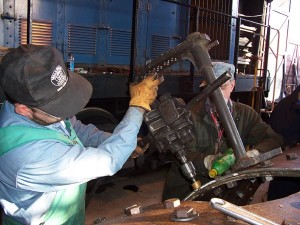
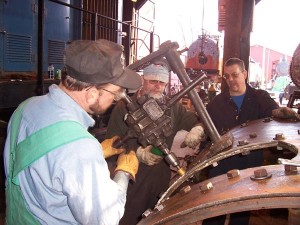
A whole list of things were accomplished starting Friday evening as Steve came in then and prepped an air jam to be used for riveting. The air jam takes the place of one of the rivet guns by holding the rivet in place by means of an air cylinder that extends when the throttle is opened. The rivet is then “jammed” into place and held tightly enough that the other end can be riveted over and the head formed. This is a much safer approach as you don’t have two air guns pointed at each other near the edge of the work. It is also much easier on the crew as you don’t have to hold the rivet gun against the blows of the other gun.
Saturday Steve then finished a staybolt buck that had been started a while ago. The bucking bar is a heavy, solid cylinder of steel about the size of a rivet gun that has had the end machined just like a rivet gun to be able to accept the rivet snaps or forming tools. The end was case hardened to withstand the hammering it will receive and a handle was fabricated. The purpose of the buck is to be held against one end of a staybolt to counter the blows of the rivet gun applied to the other end.
The staybolt is a threaded rod (in our case 7/8” in diameter) that is screwed into threaded holes in the firebox walls in order to counteract the force of the steam pushing the sheets apart. The process of driving the staybolt is to hammer one end enough to cause the metal of the staybolt to swell into the threads which will ensure a strong and steam-tight joint. The buck is held against the other end of the bolt to keep the hammering from just pushing the bolt through the threads. In blacksmith terms this shortening and swelling of the bolt is also called upsetting.
While this was going on, the final length of the undriven staybolts was determined and the threads of the bolts were staked with a punch so they wouldn’t turn while being driven.
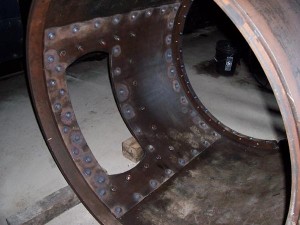
Another task undertaken was to drill the countersink portion of the rivet holes in the smokebox. As no magnetic base drill was immediately available some of the crew were introduced to an old fashioned approach–using an air motor and the “old man.” The air motor is an air-driven drill motor which can handle drilling, reaming, countersinking, tube rolling, or most any other job an electric motor can do. The old man is a bracket that is bolted to the work piece such that its arm will extend over the hole to be drilled, reamed, etc. Built into the back of the drill motor is a lead screw with a point on it exactly opposite the drill point. As the lead screw is turned it will extend away from the drill motor. If it is properly captured by the old man, it can be used to keep constant pressure on the drill bit and hold the drill motor straight and square to the work.
Mike Wahl went on an expedition and found the tubes that were purchased to go into the boiler of the #1.
Lunch was provided by Jeff Bloohm and was delicious bratwurst fresh from a butcher shop in Brownsville. What a treat!
After lunch work continued on the countersinking and then the ashpan was brought inside. After laying out the new pieces and examining the old much head scratching was employed to come up with an initial plan of attack. Mike Flood headed up putting the new pieces together. The pans themselves are now welded together and we must now come up with the best approach to either repair or rebuild the frames.
The Sunday crew of Bloohm, Bierman, Connor, Crary, Bauman, Klitzkie, Reihl and Sobczynski were up and ready to drive rivets. The air jam was employed and between 9 am and early afternoon the job was finished. Skip repaired the unloader of one of the air compressors to help speed the job.
The smokebox is finished until it is time to first fit it to and then attach it to the boiler and then fit it and the boiler to the cylinder saddle and the frame.
And as a side note, as of the end of the day on March 8, the third course patch in the boiler barrel is ready for inspection and then welding can begin on it.
A great many things have been accomplished in a short time by the willingness and giving of the volunteers. THANK YOU!
Photos by Jason Sobczynski


