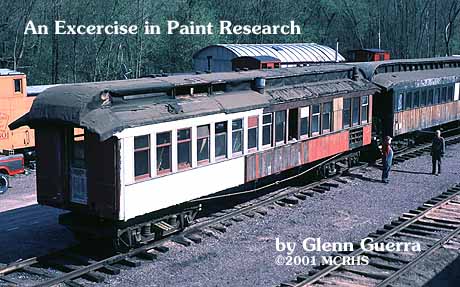
 The rebuilding of the Milwaukee Lake Shore and Western #63 requires that we collect samples of paint, study them, and determine the past paint schemes of the car.
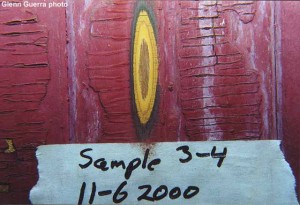
The first part of any such study is to collect samples. When the specifications for the rebuilding of MLS&W #63 were written, the collection of samples was addressed in “The Sampling and Marking Convention” appendix of the specifications. This document details how any samples and related notes are to be marked. This is important because any information gained from the sample will have little value unless it can be determined where the sample came from.
The next step is to study the samples. Our study of the samples ranges from looking at them to investigation using an Electron Microscope.
Lastly, what was the car’s color when it was new?
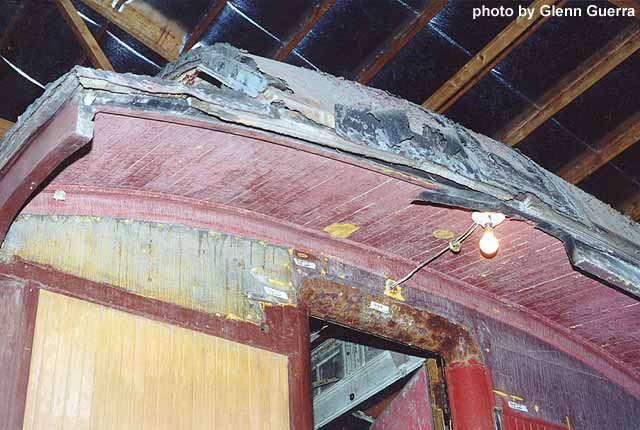
This view shows the end of the car where all the paint layers were found. This area is protected from the elements and we usually obtain good paint samples from these areas. In addition, there was a vestibule built on this end when the car was used as a building in Chicago and this further protected the paint from the elements.
Collection of Samples
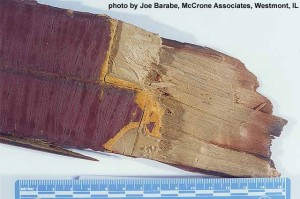
This sample was used by McCrone Associates for some of their work. The designation 1-13 tells us that the sample came from the front or number 1 area and is the 13th sample taken from the front. The front and rear designations are arbitrary for the purpose of marking as the car has no definite front or rear. Photo by Joe Barabe of McCrone Associates, Westmont, Illinois.
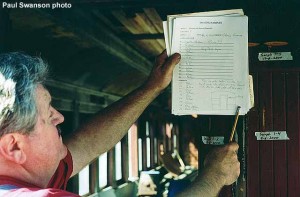
All paint sample locations were assigned a catalogue number and field notes made of the observations, as well as photo documentation of the paint sample areas. In the photo at left, Project Manager Glenn Guerra compares field notes with the paint sample locations at the front end of the car.
The railroad car has many different areas and features much like a house does. Just as with homes of the 1890’s, it is not uncommon for these different areas and features to have been painted differently. The difficulty stems from the fact that the car is 113 years old, the paint is badly worn, and it was not uncommon for the railroad to remove all the old paint prior to repainting. The preferred method of paint removal by the railroads was to burn the paint off with a blowtorch. In the process a lot of car shops were burnt down. The first step in our collecting then was to identify the areas of the car and collect something from all of them. When we arrived at the ends of the car, we found that there was quite a bit of paint on one end. We did a sanding through the paint layers and determined that some areas under the hood had 29 layers of paint and clear finish on them. Some of the ceiling boards under the hood had 21 layers of paint and clear finish. This appeared to be all the paint layers ever applied to these areas. The sample areas were given a catalogue number and field notes were made of the observations in accordance with the sampling and marking convention established for the project. Photos were taken of these sites to complete the identification.
There was so much information in some of these areas that it has been determined that the pieces involved will be removed from the car so that the information contained in them may be preserved. These and all other samples removed from the car are immediately given a catalogue number and also marked in accordance with the sampling and marking convention. A benefit of this is that the information contained in this car may be studied for years after the rebuilding is complete.
Other areas of the car have what appears to be no paint but there is still information to be had. The trim of the car is nailed on and as a result, the paint will “bleed” under the trim. This “bleeding” paint is also unaffected by the removal of paint by the railroad. When the trim is removed, crumbs of paint remain and can be collected. These samples are catalogued in the same manner as the larger samples. In areas such as the sides of the car where there is almost no paint left on the car, this is the only means of getting any information.
Study of Samples
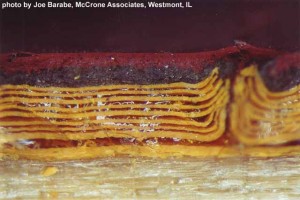
A photograph of the paint from area sample 1-13. This is the sample used for the Energy Dispersive X-Ray Analysis. The bottom of the picture is the wood. The crack and distortion of paint layers at right is from the paint film shrinking and cracking. At the top is the “Pullman” green, and the final layer is the mineral red color applied to the car when it became a building.
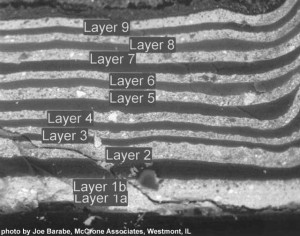
This photo of the cross section of the yellow paint layers from sample 1-13 under the hood, enlarged from the photo below, shows the layers of paint labeled by McCrone for indentification in their analysis. The light areas are the yellow paint and are labeled layers 1 through 9. In between the yellow layers are the clear varnish layers.
Next comes the study of the samples and the car in general. We have only one maintenance document from the railroad that owned this car and that came from the Chicago and North Western. In addition to being the only document, this document covers the period from 1909 to 1935 and the maintenance performed is by letter code and not very descriptive. So our information must come from the car itself. Our first observations on the maintenance of the paint job are that it appears not all of the paint was burned off during any of the repainting that was done. This can be seen by looking at the car. Closer investigation required sanding through the paint layers and looking with a magnifying lens. At this point we determined how many layers of paint and clear finish there was at that location.
At some locations the paint was too fragile for this treatment and we had to use other means. Flakes of the peeling paint were collected and then some of them were mounted in a block of polyester resin. We then polished the blocks and were able to look at the edge of the paint chip. With this method all the layers were visible with a strong magnifying lens and we could determine the order that the paints were applied. On areas where there was almost no paint and we had to look under trim, and in corners we used the same mounting techniques. At these locations the definition of the layers is not as clear but it will point out the presence of a color.
Our next step was microscopy. For this work we went to Joe Barabe at McCrone Associates in Westmont, Illinois. Joe and his colleges used Polarized Light Microscopy and Energy Dispersive X-Ray Analysis. With Polarized Light Microscopy Joe was able to determine the pigments and fillers used in the paint. We then requested the Energy Dispersive X-Ray Analysis to determine the elemental matter present in the paint. We were looking for any changes that would indicate something distinct about paint layers of the same color. Some of the findings from Joe’s work were presented on behalf of the Mid-Continent Historical Society at the 53rd annual Inter/Micro-2001 microscopy conference in Chicago Illinois on June 27, 2001.
What Color?
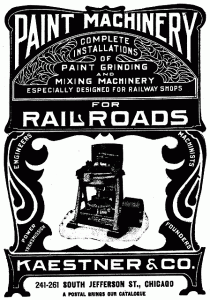
An advertisement from the June 1904 issue of Railway Master Mechanic illustrates a paint grinding mill. An article later in the same issue described the mill and noted the Chicago and North Western Railway as being one of the users of these mills.
Well you have been waiting until now for the answer to the big question: What color was the car? It appears to have been yellow and tan as a Milwaukee Lake Shore & Western car. The body was yellow and the letter board and clearstory were tan. The yellow paint is made of white base with Chrome Yellow and Yellow Ochre. The tan paint was made of white base and Chrome Yellow and Red Lead. On the sash there is no evidence of yellow or tan paint initially. The sash may have been natural varnish finish. What is not clear at this writing is whether the windowsill and battens around the window were tan. As a Chicago and North Western car it appears to have had a yellow body with green letter board. The roof and sash appear to have been mineral red at this time. At some time later the sash was painted yellow. Then the entire car was painted the “Pullman” green. The areas under the hood that had all the layers of paint appear to have the original paint from the Barney and Smith Car Company.
The master painter from the Barney and Smith Car Company, at the time car #63 was built, was a Mr. M.W. Stines. He was on the advisory committee of the Master Car and Locomotive Painters Association of the U.S. and Canada. He presented a paper at the 1886 convention of the painters about painting passenger cars. Part of this paper was printed in the November 1886 issue of the National Car Builder magazine. In this paper he discusses the varnish applied over the paint and recommends two to three thin coats of varnish. He then goes on to state that every six months the car should be rubbed down with pumice and oil (linseed oil) to clean it and then apply varnish on the yearly intervals. We have no records from the Milwaukee Lake Shore and Western railroad to indicate if they followed his instructions but we do have some other information.
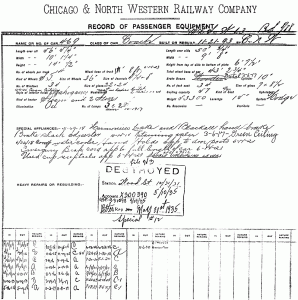
This passenger equipment document from the Chicago and North Western Railway is the only record of maintenance for our car. Note that this record is from 1909 to 1935 and that the maintenance performed is referred to by a letter code. Document courtesy of C&NW Historical Society.
The master painter for the railroad, a Mr. T. Laughran, became a member of the painters association at the 17th annual convention in Chicago, Illinois, September 9 and 10, 1886. In addition, the railroad was buying both freight and passenger cars from the Barney and Smith Car Company. This would indicate that Mr. Stines and Mr. Laughran had many chances and good reason to confer with each other. When we look at the first layer of paint and varnish on the areas under the hood we see they are thicker than other layers. It appears to us that these first layers are the 113-year-old Barney and Smith Car Company paintwork and possibly the Milwaukee Lake Shore and Western maintenance. In 1893 the Chicago and North Western Railroad purchased the Milwaukee Lake Shore and Western railroad and presumably all maintenance was done to their specifications from that point on.
The next eight layers of paint we see under the hood are yellow also. We have found in other places the green and red used by the Chicago and North Western. What is interesting about the paint in these layers is that the Chicago and North Western appears to have been making their own paint for quite a long time.
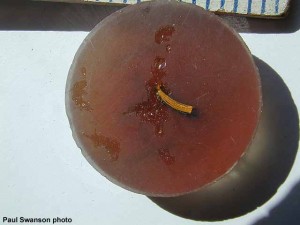
A closer view of one of the mounted samples. This method allows restorers to work with and view samples that are otherwise too fragile to handle. Note the thin layers of yellow paint and varnish in the sample. This particular polyester resin disk is about 1 1/2 inches in diameter.
In the Railway Master Mechanic magazine in June 1904 there appears an advertisement for a paint mill for grinding paint pigments. In the same issue is an article about the mill, which says the Chicago and North Western owned one of them. This is why we did the Energy Dispersive X-Ray Analysis. We were able to see the elements that made up the components of the paint and did see some differences from paint layer to paint layer. We could see for example when they added calcium carbonate to the paint as filler. We also see that they added titanium dioxide white and zinc white to the last yellow layer. The titanium dioxide is believed to have not been used in architectural paints until 1920.
Another element we see which is a little puzzling is sodium. This is not common in paint pigment but may be an impurity. The yellow ochre used is a pigment that is mined from the earth. The different mines may impart different impurities in the pigment.
This all would lead us to think that the Chicago and North Western was manufacturing their own paint. In addition we are testing to see if the impurities in the layer are a means of identifying a paint job. For example there are two layers of yellow paint on the sash. Which two of the eight yellow layers are they?
One last thing on the paint is that all the yellow layers on the car are covered with a clear coating of varnish. When we get to the “Pullman” green layers there is no defined clear layer. The car was painted in the traditional flat paint with varnish topcoat until the late 1920’s. When the new green color was adopted by the Chicago and North Western, a new paint was used. This new paint was self-glossing enamel.
This is all we know at present about the paint but because of the sampling and marking convention established for this project, this kind of study will be able to continue long after the car is on display

